
Tutorial #3

This tutorial will cover how to make the infamous Flaming Text. It is very easy to do and requires only one file to download extra to make it. Get it here. Its called Eld.pal zipped up. Extract it to somewhere where you will remember (ie. desktop).
Just follow instructions in order :)
1.) Create a New Image with the following attributes: 400 x 200 pixels, Foreground Color: Black, Background Color: White.
2.) Use Text Tool to select a Font and Size. Make sure it Antialias and Floating are checked in. For this example I chose Chalk Bold font at 85pt.

3.) Deselect the text by going to Selections then None.
4.) Now we need to make the text a bit blurry. We do that by going to Image then Other then Erode. Depending on the font and size you might need to do this twice or even three times (sometimes more).

5.) To make those little flames takes some creativity, it might take a couple of tries to get it the way you want it. So save this before you proceed. Select the Retouch Tool (the pointing finger) and set the options box to the following: Size: 5, Shape: Round, Opacity: 70, Hardness: 60, Paper Texture: None. Make Erratic Vertical /Diagonal Strokes so that they look like black flames coming out of the text. Practice at this.
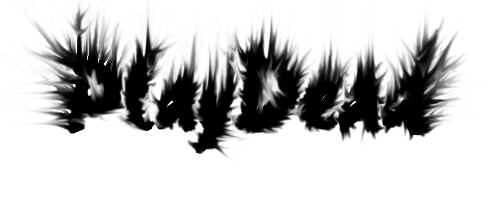
6.) Time to add the original text on top of this. Select White as your Foreground Color. Then use Text Tool to add the original text on top of your current text. Line it up so that its right in the middle of your original text.

7.) In order to add the flames we must change the image properties to grey scale. You do that by going to Color then Grey Scale. Now you need to use a palette file to get the effect of fire. Download it here. Its called Eld.pal file. Once d/l extract it to somewhere you remember (ie desktop). Now go to Colors then Load Palette, pick the eld.pal, and make sure Maintain Indexes in checkmarked. Click Ok.

8.) BOOM! You are DONE!
Just Crop Your Image and You Are Done!
That concludes Tutorial #3. Any Questions?